Figure 0
Email black and white list is an effective filter for outgoing(SMTP) and incoming(POP3) emails. You can either use the black list or the white list. Only email accounts in the white list are allowed when white list is enabled. Enable black list means allow all except those listed in the black list.
You can not block web-based email here. If you want to block web-based email, you need to block the website. Please refer to "Website Black/white List Configuration".
Please note that the email black/white list is applied to the email user accounts which may be different with the email addresses.
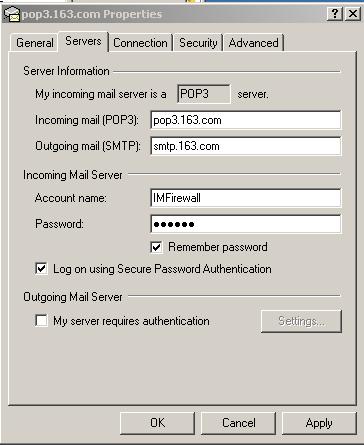
Take Outlook as an example, click "Tools" -> "Accounts" -> "Mail" -> select your email -> "Properties" -> "Servers". As in Figure 1, the account is "IMFirewall" which will be scanned by the Black/white list.
To make blocking work, you can change an existing blocking level or add a new one. Here we start this example from adding an email black/white list.
Click "Control Settings" -> "Black/White List Settings", choose "Email Black/White List" type, then press "Add", as in Figure 1.1.

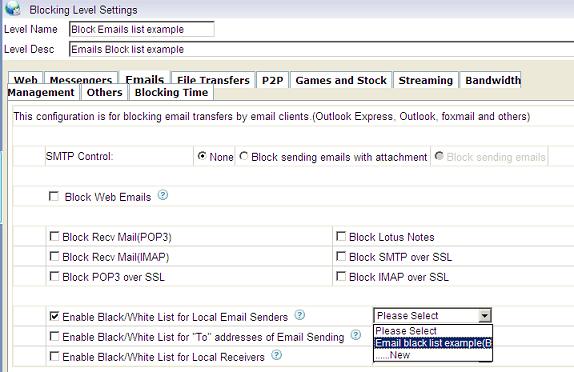
As in Figure 1.2, choose a type and fill in the name and accounts to be filtered.
One address per line. Wildcards(*,?) are supported. Wildcard '*' means multi-Character, while wildcard '?' means a single character.

Add a blocking level named "Block Email". The system supports three types of email black/white list. Here let's take "Enable Black/white List for Local Email Senders" for example.
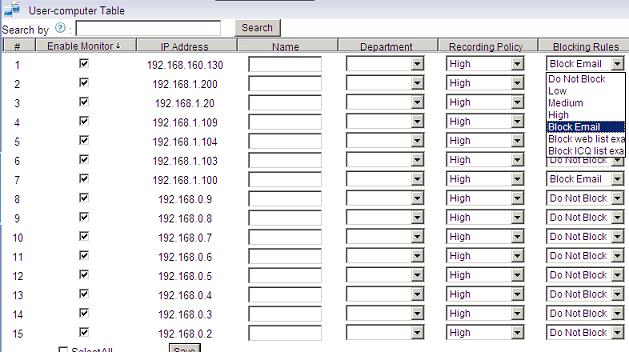
As in Figure 2, check the "Enable Black/white List for Local Email Senders" and choose "Email black list example" in the dropdown textbox.
You need to set the blocking level for computers which you want to implement this blocking policy. As in Figure 3, choose the "Block Email" blocking level in the "Blocking Rules". Make sure that "Enable Monitor" are chosen for computers you want to block.